
Update: As of 27/03/2019, AWS SFTP can now be launched inside a VPC
AWS SFTP is a Managed SFTP service that was launched at re:Invent 2018 last year. Jeff Barr has a great post about it on the AWS Blogs
Jeff’s blog post takes you through the steps involved in setting up the service. The SFTP service uses S3 buckets as the “backend” for hosting the files. When a SFTP user logs into the server and uploads a file, the file is transferred to a S3 bucket. The steps described in the post work fine if the SFTP service and the S3 buckets reside in the same account.

But what if you want your SFTP users to transfer files to S3 buckets that reside in other AWS Accounts? The AWS Console will only allow you to choose S3 buckets that live in the same account as the SFTP server when setting up the SFTP user
One option to address the problem would be to launch the SFTP service in each and every AWS account where you want your users to transfer files. This would be a very expensive and not to mention an inefficient way of addressing the problem.
Luckily, there is an easier approach that involves setting up cross account IAM roles and S3 bucket policies to address the problem. This will give you the following benefits:
- Centrally Managed SFTP Service
- Users are managed in a central AWS account
- Save $$$ as you are not deploying multiple SFTP services in every account

1. Setting up the SFTP Service in the Central Account
The first step is to launch the SFTP service in the “Central” account. There are three main components involved in getting started with the SFTP service
- SFTP Server with options to specify custom hostnames
- Choosing an Identity Provider – AWS Managed or Integrating it with API Gateway
- IAM Role for the Transfer service to send logs to Cloud Watch
The AWS documentation for the SFTP IAM role required for logging has not been updated as AWS Transfer is actually listed as an official service under the list of services when you create an IAM Role.
I create a “transfer-service” IAM role with the following inline policy attached that grants it access to CloudWatch logs. The trust relationship for this role allows: transfer.amazonaws.com
{
    "Version": "2012-10-17",
    "Statement": [
        {
            "Effect": "Allow",
            "Action": [
                "logs:CreateLogStream",
                "logs:DescribeLogStreams",
                "logs:CreateLogGroup",
                "logs:PutLogEvents"
            ],
            "Resource": "*"
        }
    ]
}
Once set up, AWS will create the SFTP service across all 3 AZ’s (assuming you are setting this up in Sydney)
There are a few things to note about this service. If you choose to launch a “Public” SFTP service:
- The service is not launched within a VPC
- It doesn’t integrate with AWS Security Groups and as a result you cannot restrict the source ip address
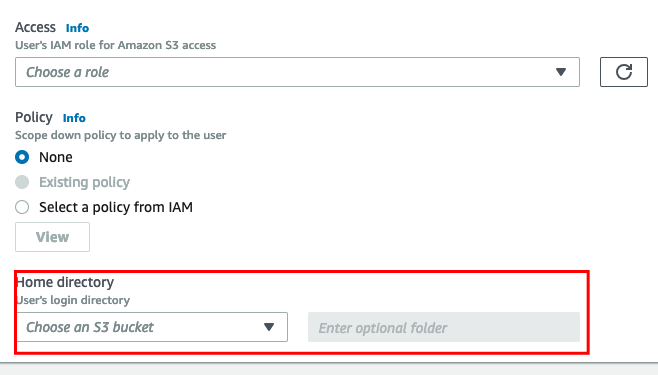
2. Setting up a SFTP User in the Central Account
Now that you have the SFTP service launched in your Central AWS Account (12345), the next step would be to create a SFTP user which will allow the user to connect to the server endpoint and start working with files.
There are 4 things involved in setting up the SFTP user:
- IAM Role for the SFTP user
- Home Directory of the SFTP user – This is an S3 bucket with an optional folder
- SSH Public Keys for the SFTP user to authenticate
- S3 Bucket Policy – This allows the SFTP user created in the Central Account to access the S3 bucket
Let’s create a sftp user “test-user-ZZZZZ” which will use a S3 bucket “test-bucket-ZZZZZ” that lives in account “032467” as the home bucket.
The following IAM role allows the SFTP user to access the S3 bucket. This role will allow the user to Read, Write and Delete objects inside the S3 bucket. Ensure you select transfer.amazonaws.com as the service when creating the role.
{
    "Version": "2012-10-17",
    "Statement": [
        {
            "Action": [
                "s3:GetObjectAcl",
                "s3:ListBucket",
                "s3:GetBucketLocation",
                "s3:PutObjectAcl"
            ],
            "Resource": [
                "arn:aws:s3:::test-bucket-ZZZZZ"
            ],
            "Effect": "Allow"
        },
        {
            "Action": [
                "s3:PutObject",
                "s3:GetObjectAcl",
                "s3:GetObject",
                "s3:DeleteObjectVersion",
                "s3:DeleteObject",
                "s3:PutObjectAcl",
                "s3:GetObjectVersion"
            ],
            "Resource": [
                "arn:aws:s3:::test-bucket-ZZZZZ/*"
            ],
            "Effect": "Allow"
        }
    ]
}
The next step would be to create the SFTP user and assign the home directory and IAM role. This cannot be done via the AWS Console as it will only list the S3 buckets that are in the same account as the server (as described above). You can overcome this via AWS CLI:
aws transfer create-user --home-directory "/test-bucket-ZZZZZ" --role {{ iam_role_arn }} --user-name "test-user-ZZZZZ" --server-id {{ sftp_server_id }}Let’s generate a key pair for this user
ssh-keygen -t rsa -f "/tmp/test-user-ZZZZZ" -N ''Upload the public key via AWS CLI:
public_key="$(cat /tmp/test-user-ZZZZZ.pub)"
aws transfer import-ssh-public-key --server-id "{{ sftp_server_id }}" --user-name "test-user-ZZZZZ" --ssh-public-key-body "${public_key}"
To recap what we have done above:
- We have created a SFTP server in the Central Account with an IAM Role to access CloudWatch Logs
- We have created a SFTP user in the same account and have assigned it a home directory (S3 Bucket) which lives in another account. We have also given it an IAM role that gives it access to the S3 bucket
- Assigned the public key to the SFTP user
The final step in the process would be to modify the S3 bucket policy that will give access to the SFTP user
3. S3 Bucket Policy in Account 032467
Create a S3 bucket “test-bucket-ZZZZZ” in account 032467 with the following Bucket Policy:
{
    "Version": "2008-10-17",
    "Statement": [
        {
            "Effect": "Allow",
            "Principal": {
                "AWS": [
                    "arn:aws:iam::12345:role/test-user-ZZZZZ-IAM-Role"
                ]
            },
            "Action": "s3:ListBucket",
            "Resource": "arn:aws:s3:::test-bucket-ZZZZZ"
        },
        {
            "Effect": "Allow",
            "Principal": {
                "AWS": [
                    "arn:aws:iam::12345:role/test-user-ZZZZZ-IAM-Role"
                ]
            },
            "Action": [
                "s3:PutObject",
                "s3:GetObject",
                "s3:PutObjectAcl",
                "s3:DeleteObjectVersion",
                "s3:DeleteObject",
                "s3:GetObjectVersion"
            ],
            "Resource": "arn:aws:s3:::test-bucket-ZZZZZ/*"
        }
    ]
}
And that’s it. You now have linked all pieces of the puzzle that will allow the test-user-ZZZZZ to access objects in the S3 bucket that lives in another account.
You can log into the SFTP server and test if it is working as expected using a SFTP client and the private key created above.
